Creating IIIF Manifest(s)
Navigate to the IIIF Publishing area. Here you can create folders to organise your IIIF content, and add & edit that content.
Today, we will focus only on IIIF Manifests - which as per the IIIF specification acts as a manifest of contents for your digital object. As stated in the specification, the manifest
"carries information needed for the client to present the content to the user, such as a title and other descriptive information about the object or the intellectual work that it conveys. Each Manifest usually describes how to present a single compound object such as a book, a statue or a music album."
Create new, empty manifest
Using the 'New' option, you can select to create a new Manifest. To start, we can create a very basic Manifest that uses one or more of the images that you uploaded previously.
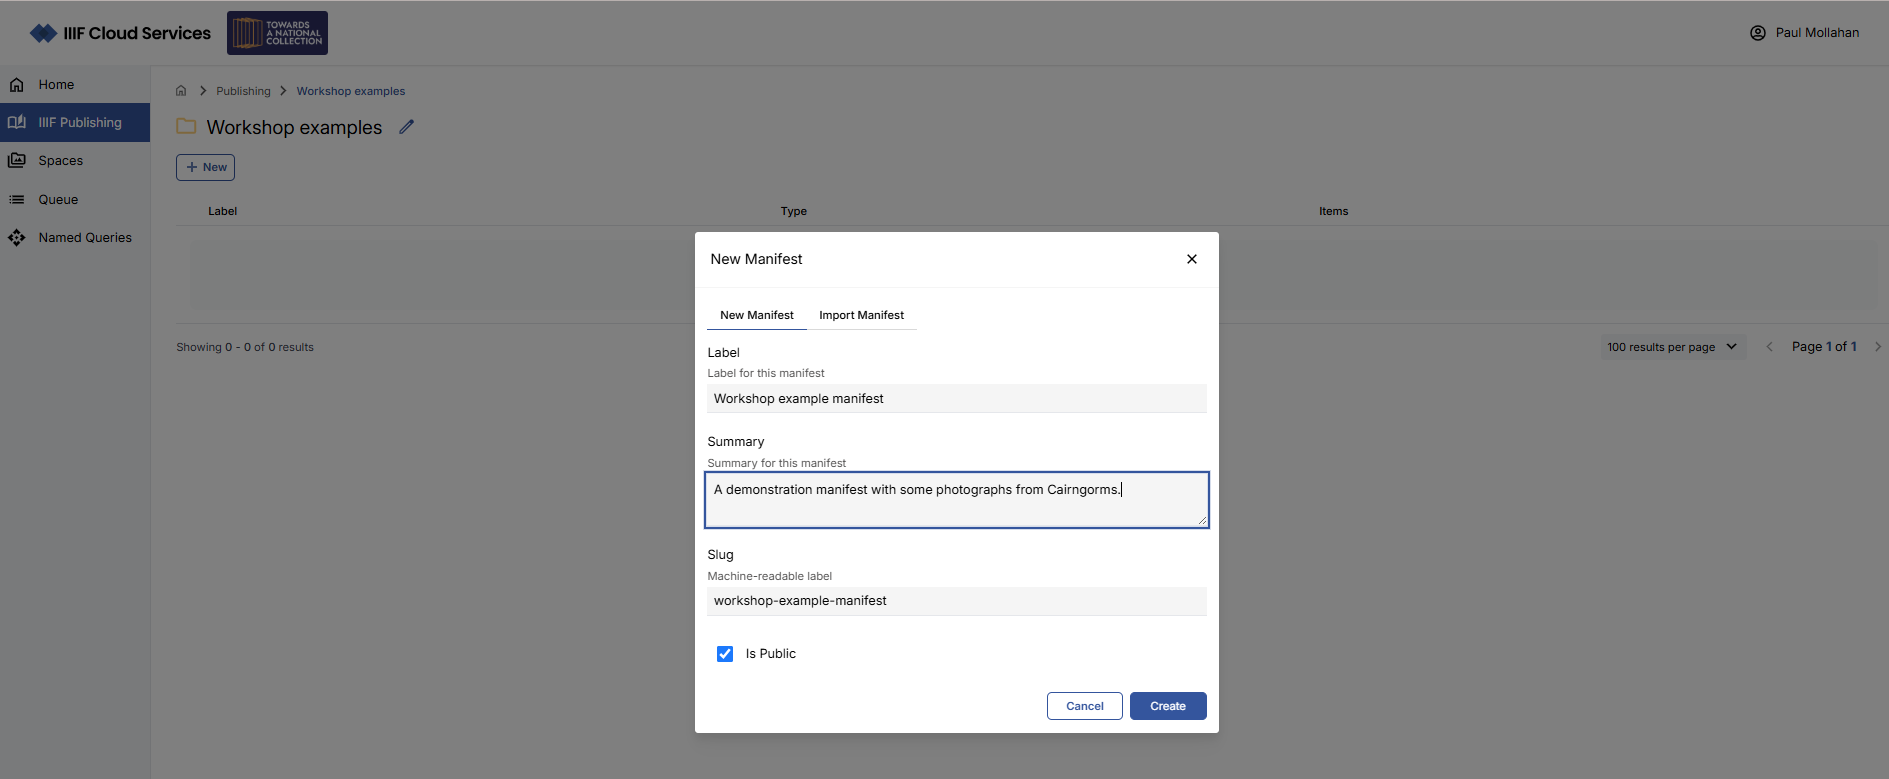
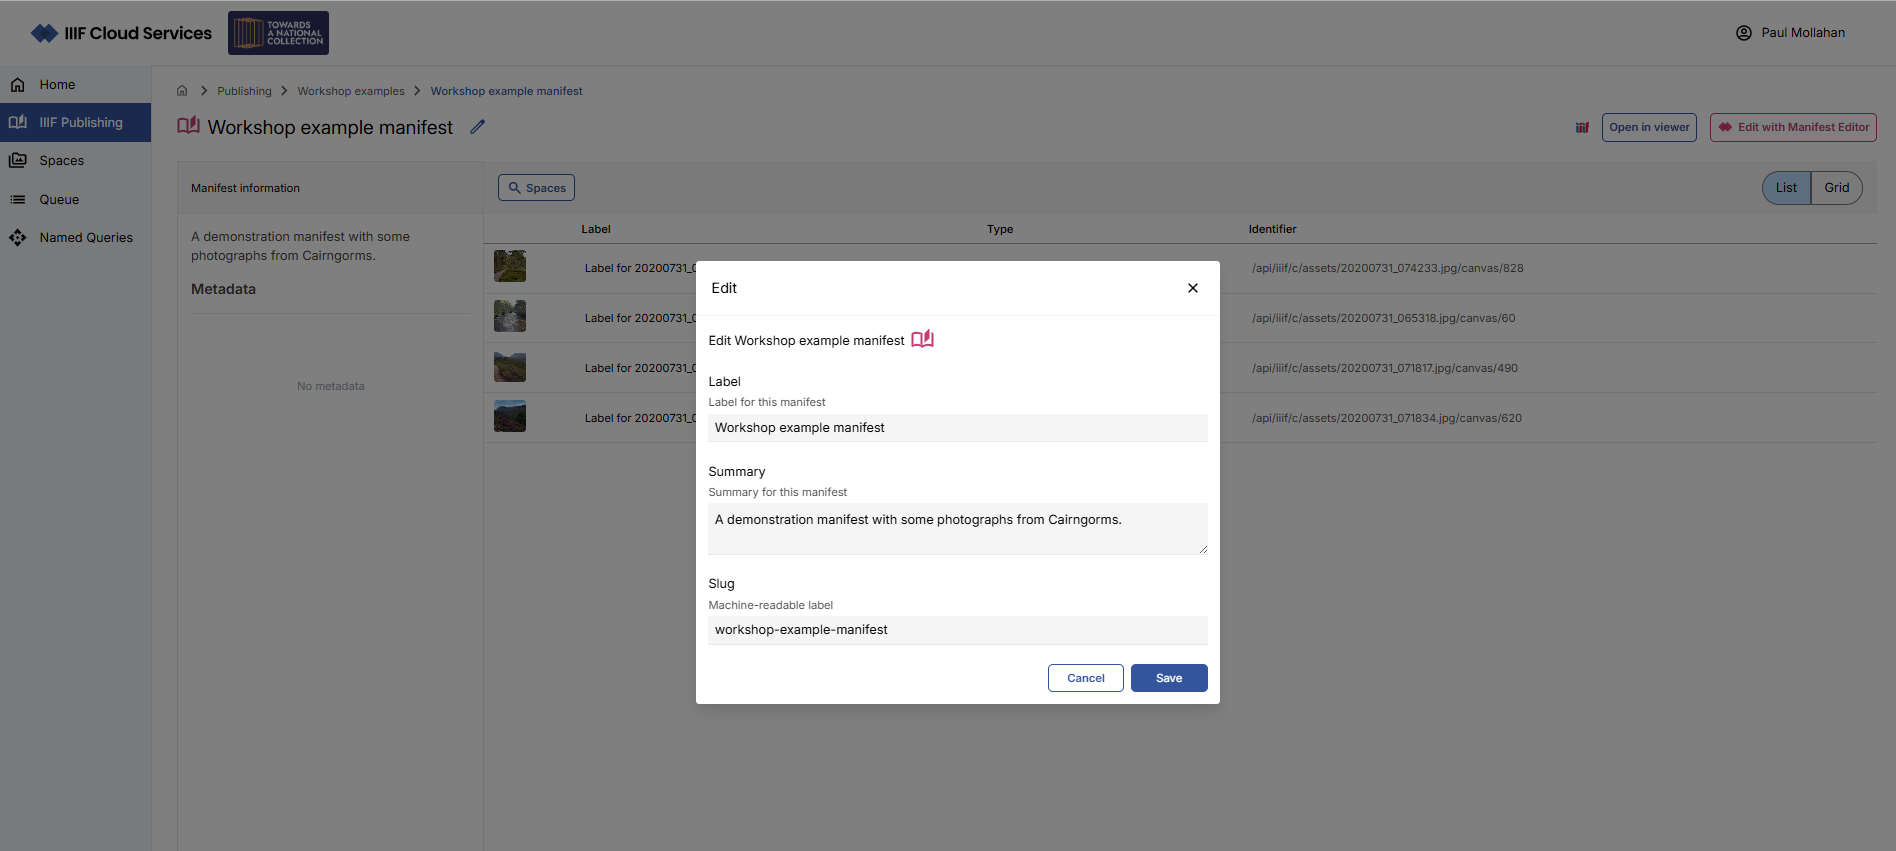
Give your manifest a ‘Label’ to identify it, and add a brief ‘Summary’ to describe the contents of the manifest. The ‘Slug’ will be automatically populated based on your label, it can be changed if required.
Click ‘Create’ to generate the new Manifest, you will then be navigated to the Manifest view, where the empty manifest will be displayed.
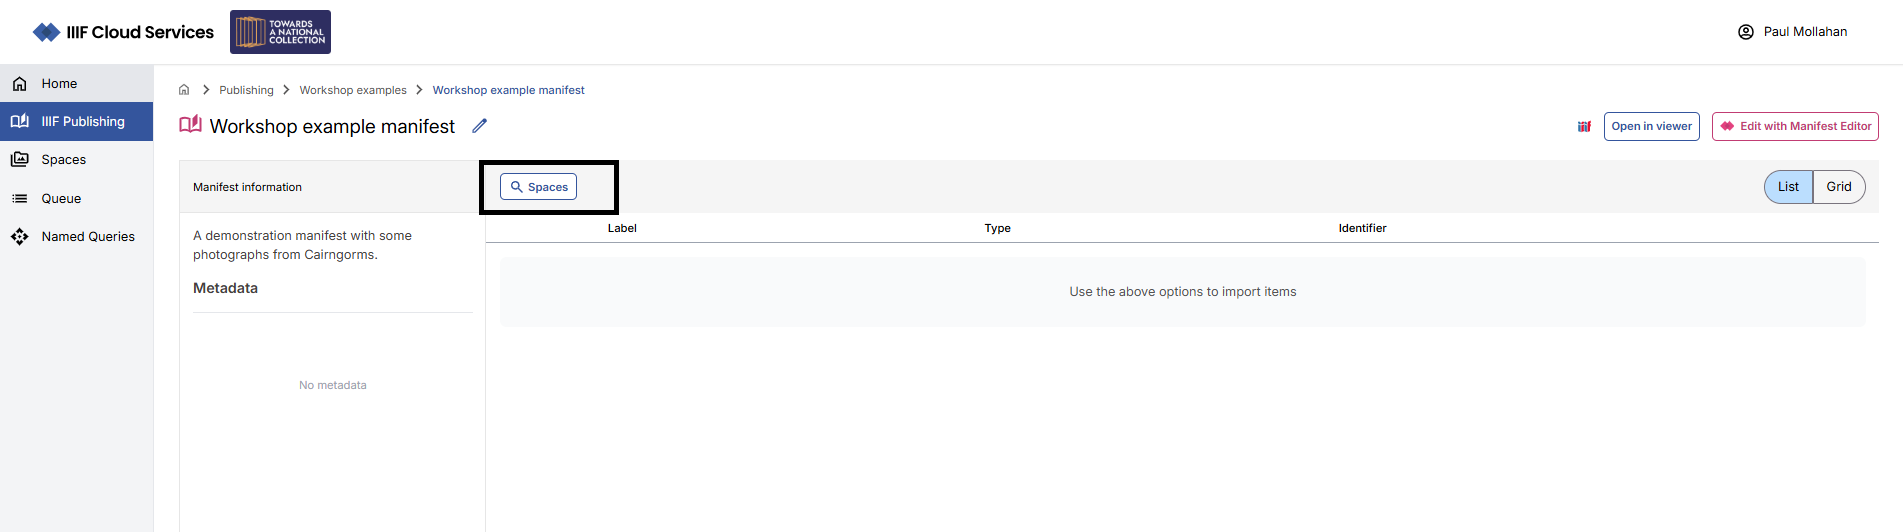
Add some images to your manifest
From this basic Manifest view, you can select one or more images from your 'Spaces' to add as a Canvas to your Manifest. Click on the ‘Spaces’ search button, and browse to find one or more of your images.
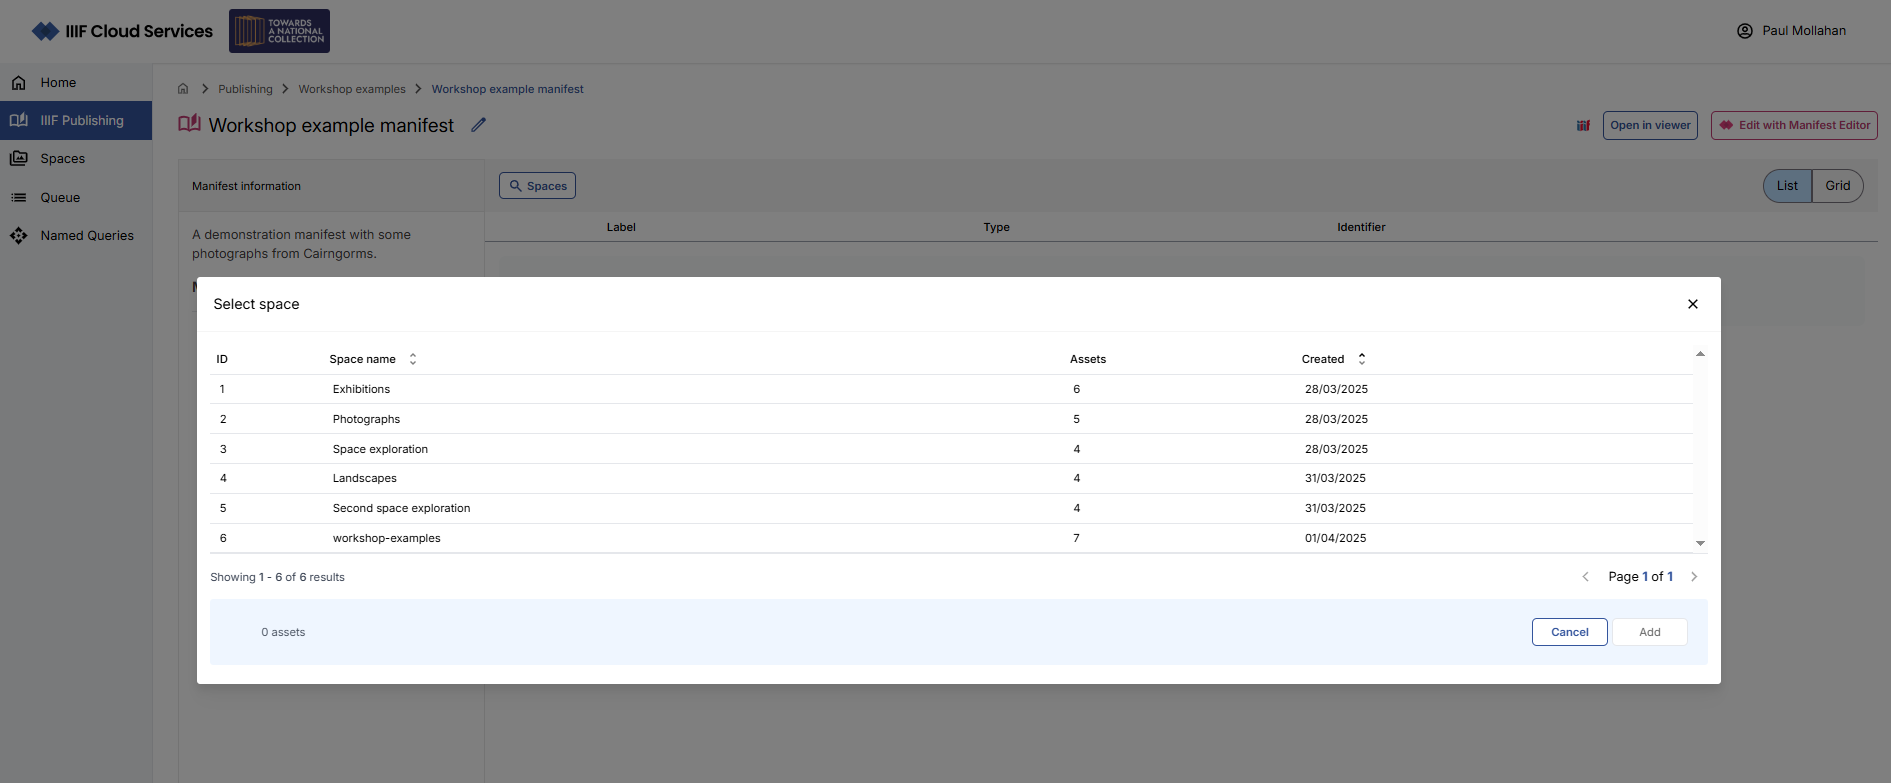
Browse to the appropriate Space, and select the assets you wish to add, and Click ‘Add’.
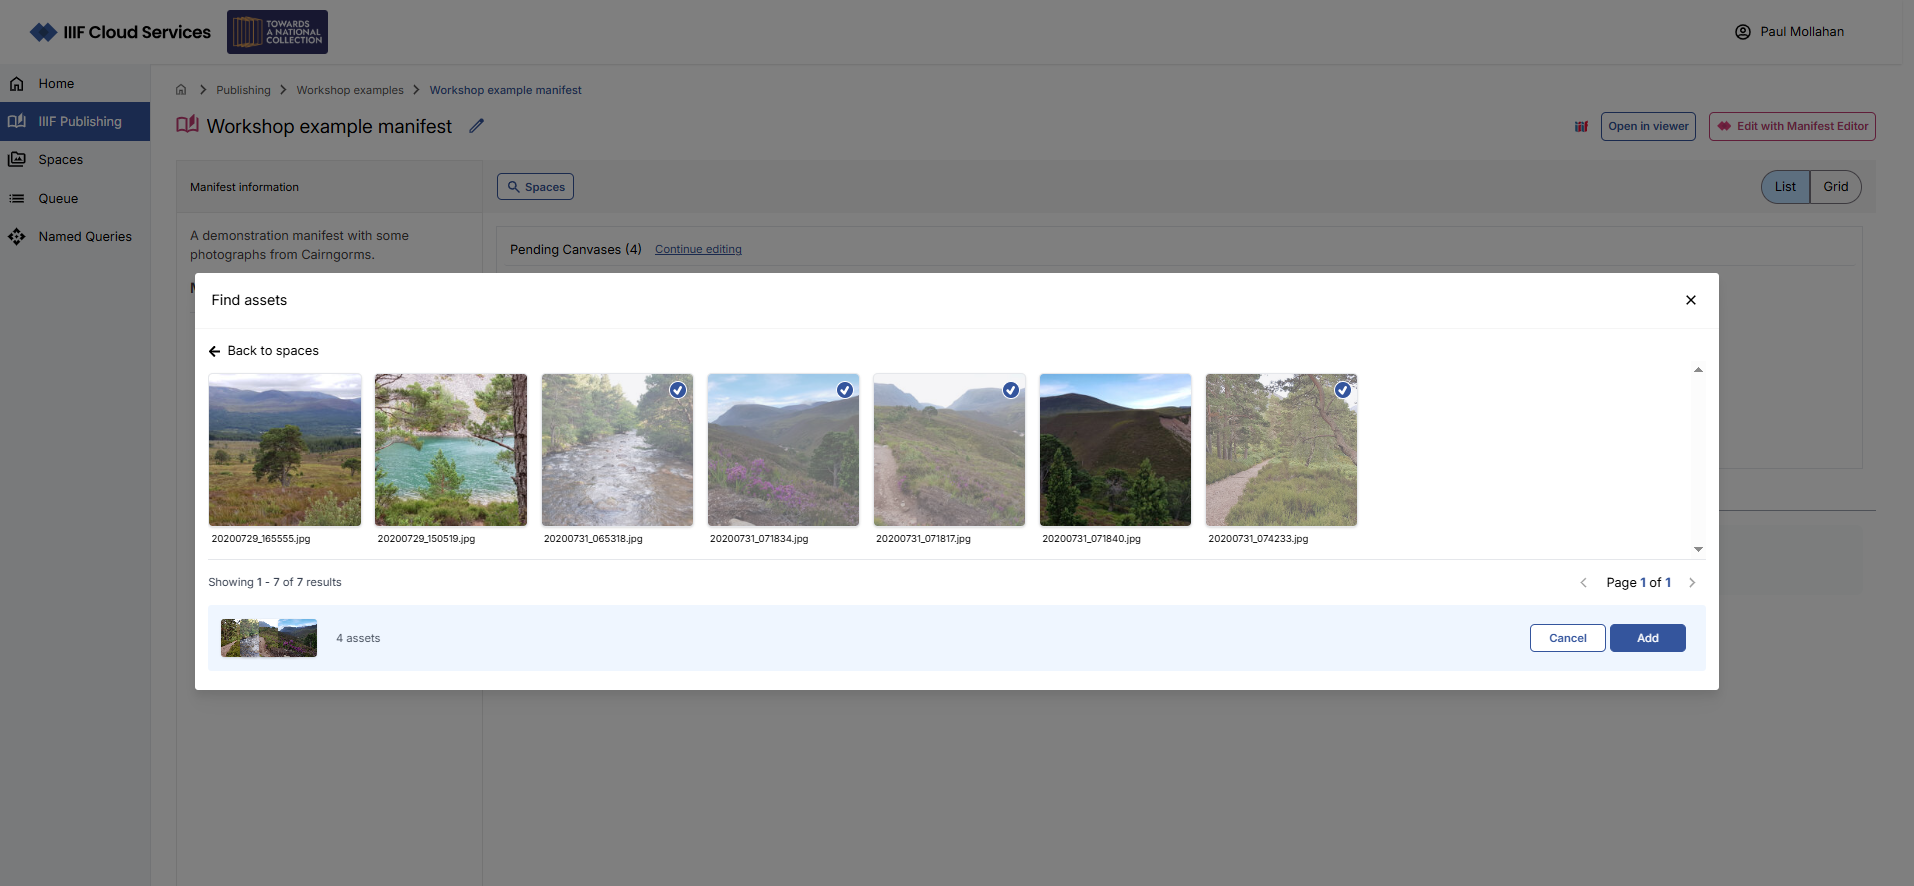
Your selected images should now appear as a canvas within your Manifest.
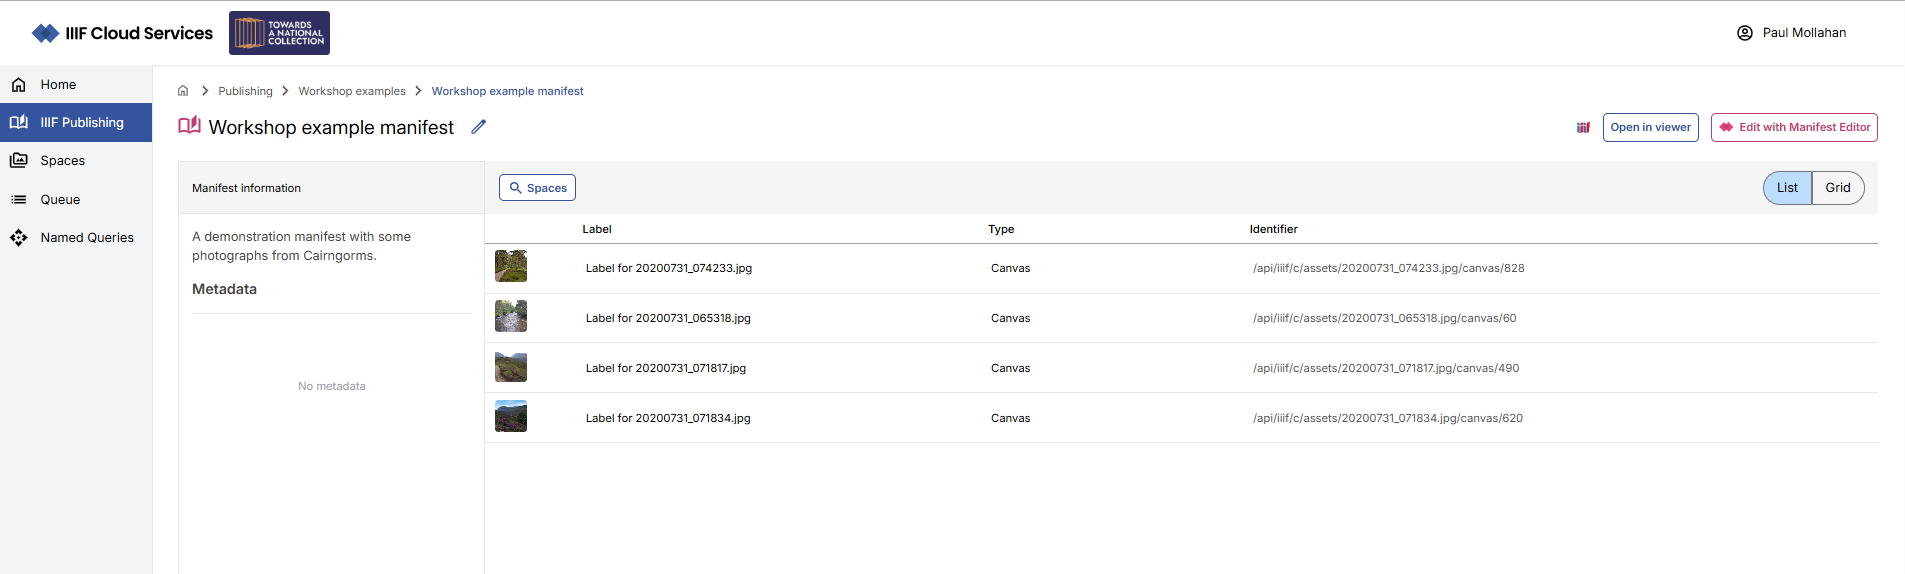
View (and share) your manifest
With one or more images added to your Manifest, you can now preview how your Manifest would be displayed by a IIIF compliant viewer. In the Manifest edit view, click on the ‘Open in viewer’ option, and select the Universal Viewer.
This will open an instance of the Universal Viewer in a new browser tab, with your example manifest. You can browse the contents of your manifest, seeing the basic metadata you added earlier and the image(s) you have selected as canvases.
Editing your manifest
The Manifest Portal view allows you to edit the basic metadata for the Manifest:
You can also use the 'Spaces' link to add more images as canvases to your manifest.
However, the main editing functionality is provided through the Manifest Editor.
Using the Manifest Editor to enhance your manifest
From the Manifest view, click on the ‘Edit with Manifest Editor’ link. This will navigate you to the Manifest Editor tool, which provides you with full editorial access to edit your manifest as needed.
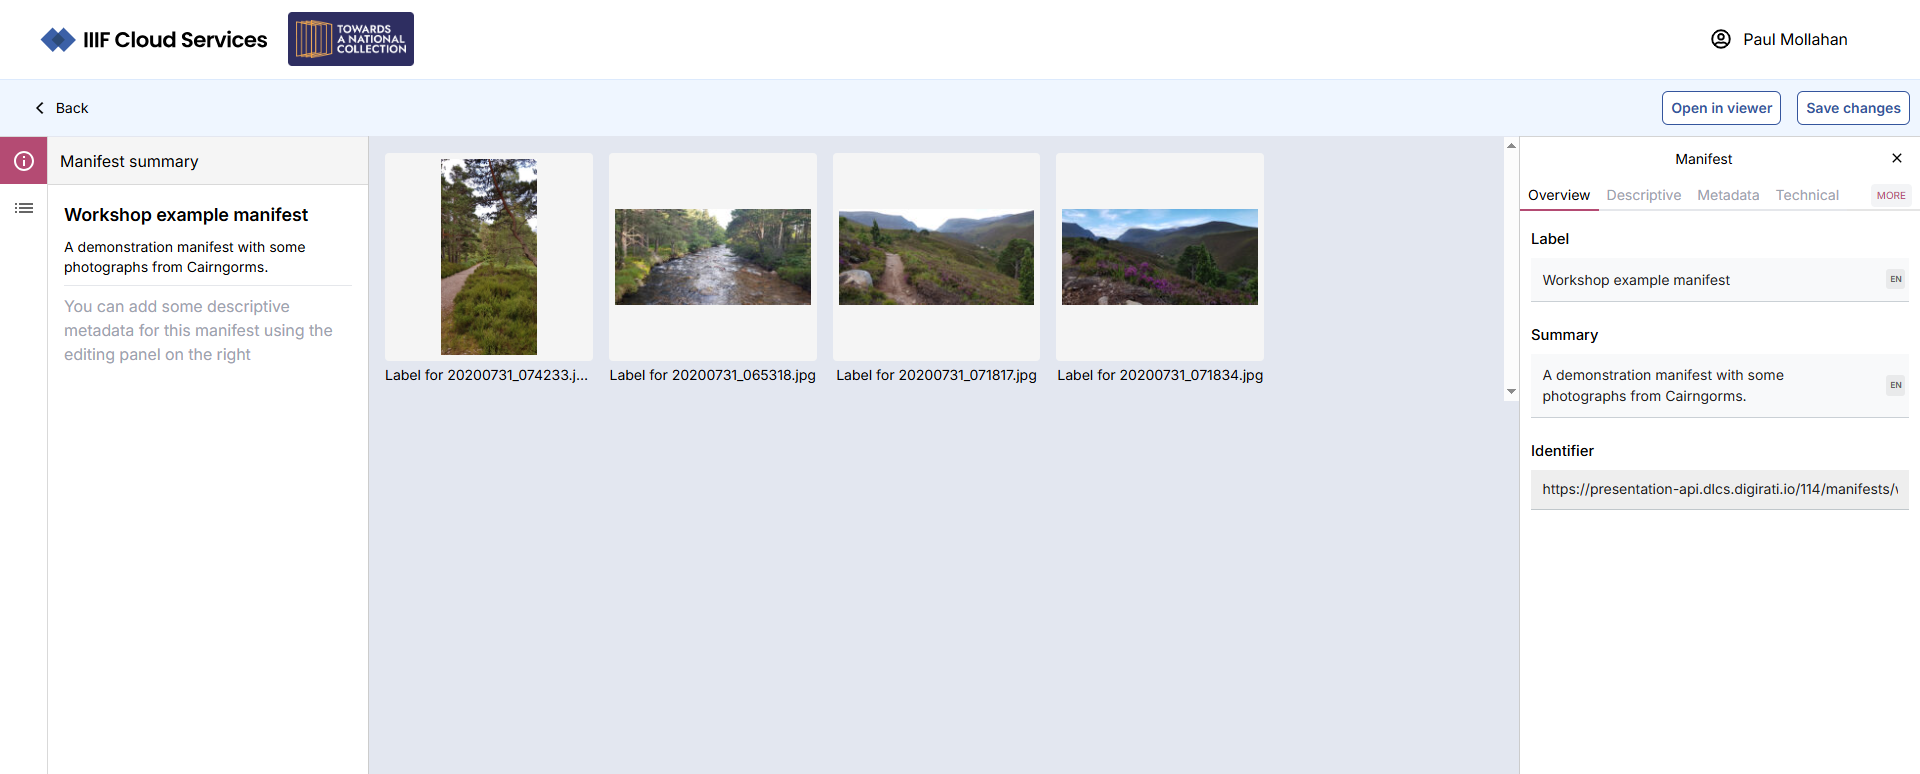
The default view in the Manifest Editor presents the Manifest summary in the left hand panel, with the detailed metadata information in the right hand panel, together with the canvases that are present in the central grid view.
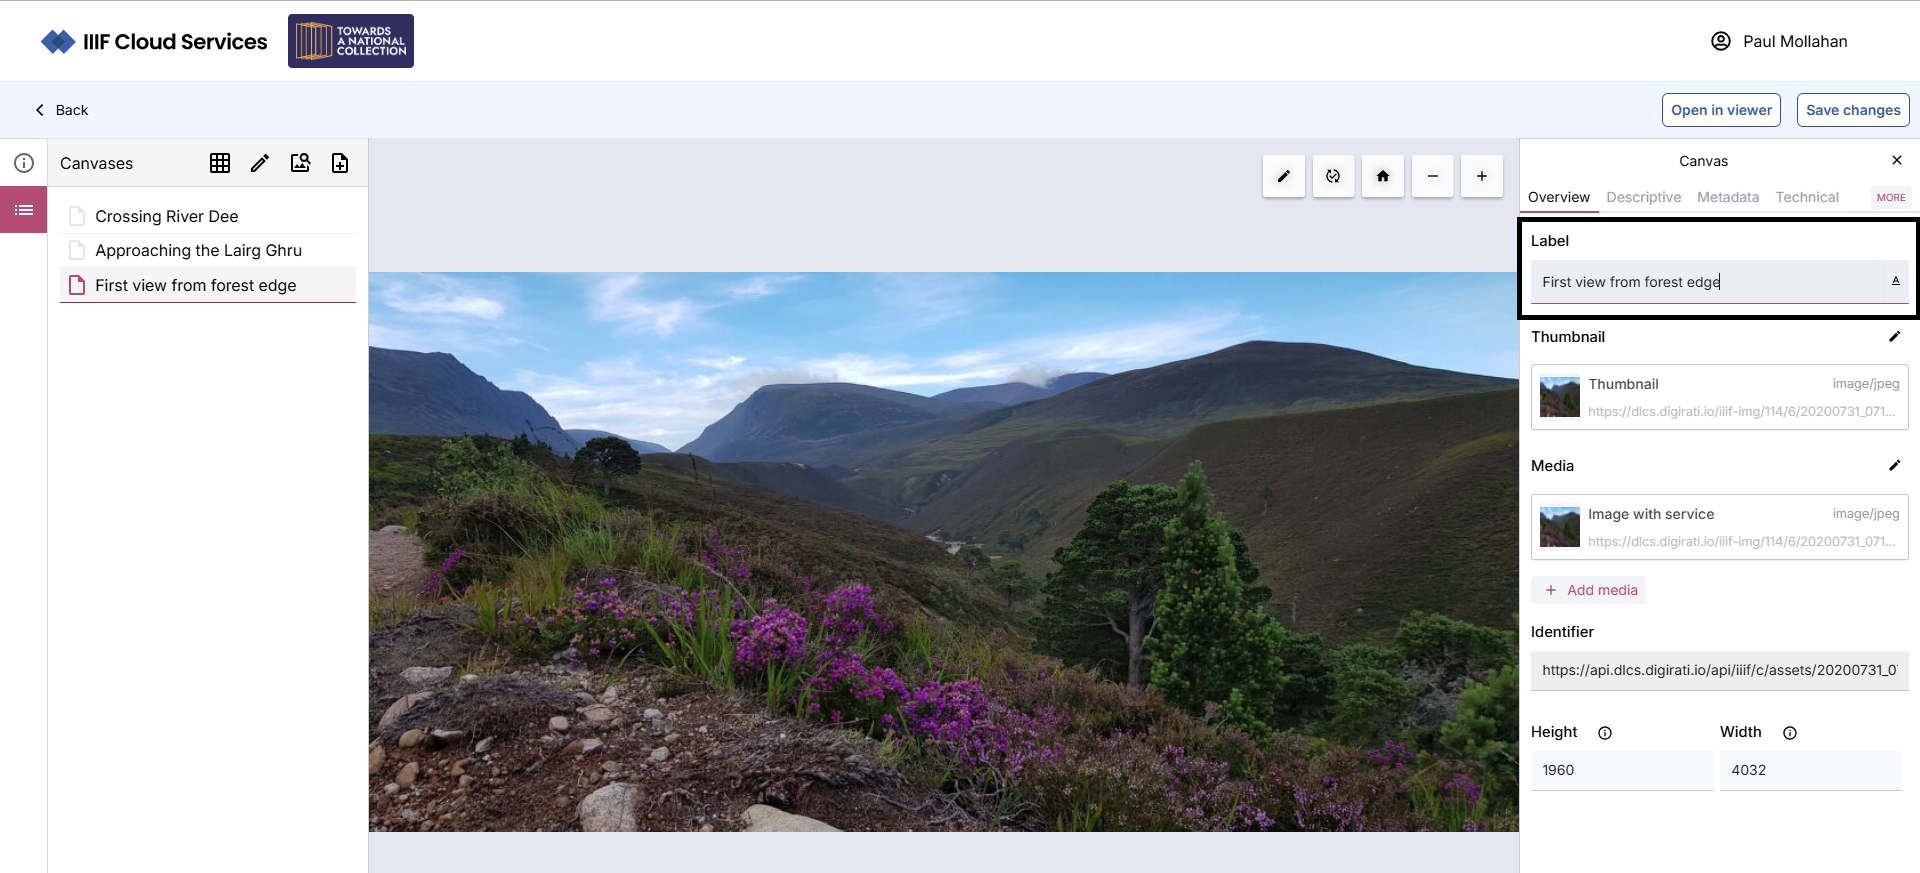
To start, the first improvement we will make is to label our Canvas(es) with a more appropriate value (it defaults to the image filename), and then update the order of the Canvases within the Manifest to better reflect the content we are presenting.
Clicking on the ‘Canvases’ icon in the left hand panel, navigates you to the Canvas view, with the right hand panel opening the metadata for the first Canvas.
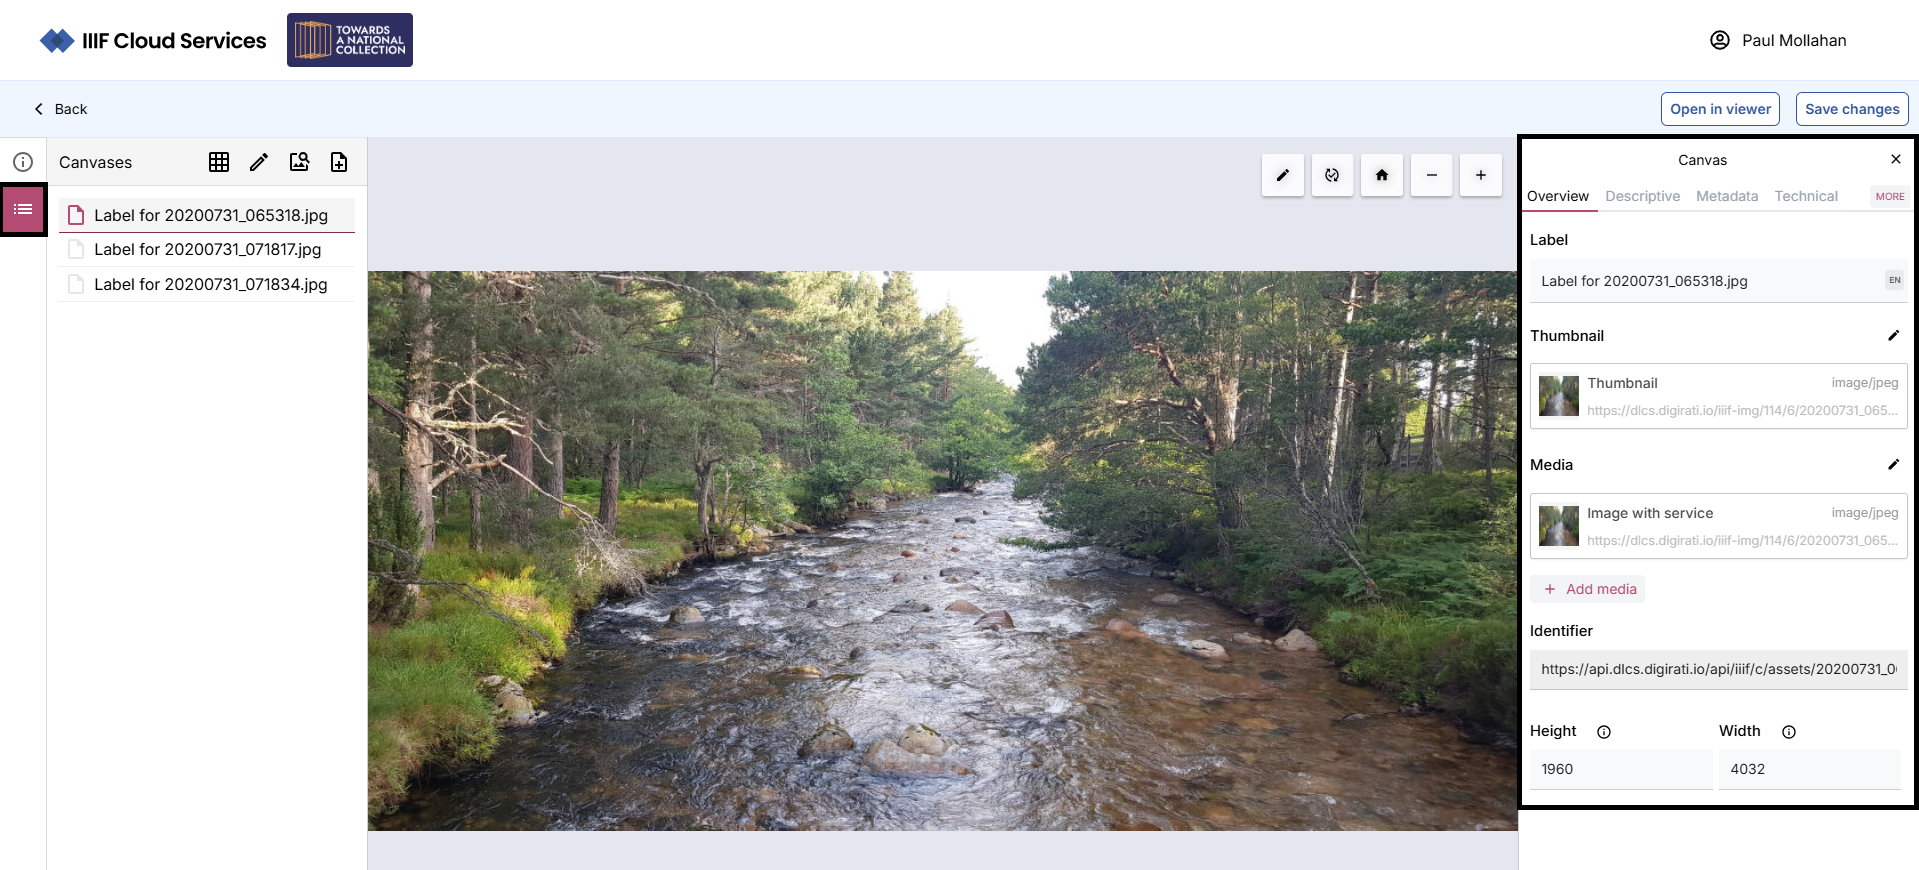
We'll start with by updating the canvas label(s) to something more meaningful (they will reflect the image name you've added):
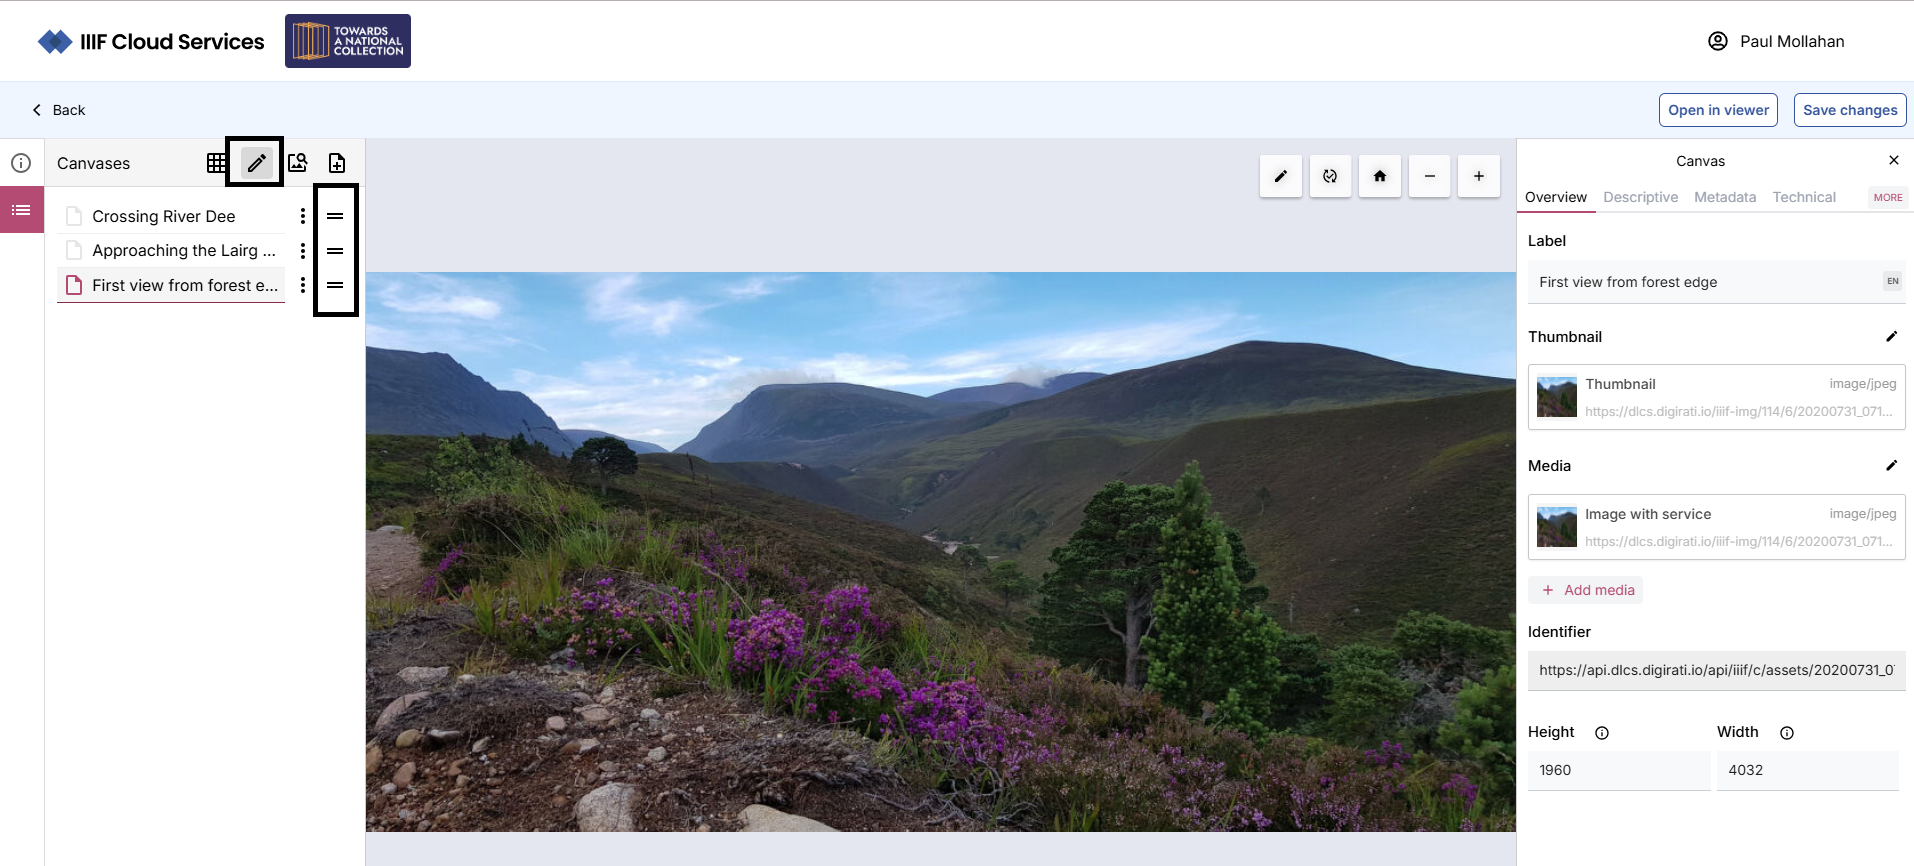
We can then update the order of the Canvases within the Manifest. To do this, click on the ‘pencil’ icon (‘Edit Canvases’) in the left hand panel top menu. Using the ‘=’ icon, you can drag the canvases into an appropriate order.
With those changes in place, we can click ‘Save changes’ to save our work.
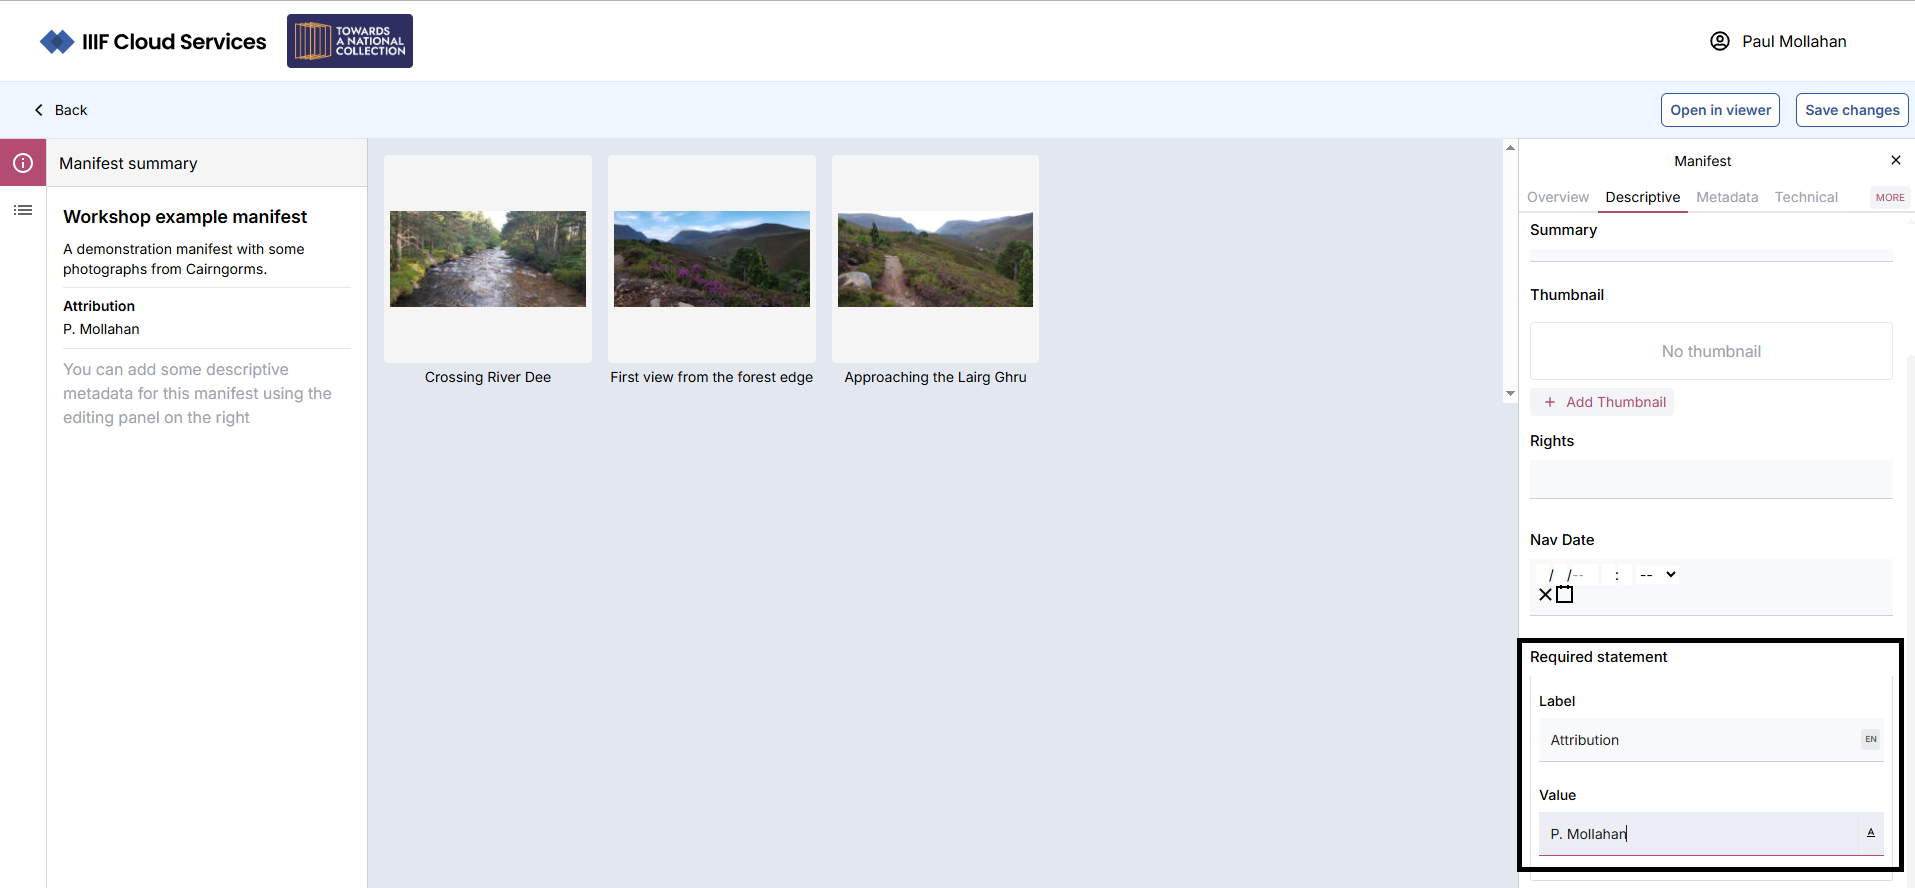
Before we view the changes, we can look at how we add more Manifest specific metadata. Clicking on the ‘i’ icon (“Manifest Summary”) in the left hand panel will navigate us to the Manifest. In the right hand metadata panel, we can select the ‘Descriptive’ tab.
Here we will add a requiredStatement (https://iiif.io/api/presentation/3.0/#requiredstatement) label and value. Click the ‘Add new’ link:

Label could be “Attribution”, and Value something relevant to the image(s) you are adding to Manifest.
Once you have added your additional metadata values, click on ‘Save changes’. You can then take a look at your work or share it using the ‘Open in viewer’ link.
You can select from Theseus, Universal Viewer or Mirador. Note that IIIF compliant viewers offer similar but differing functionality, and also provide support of some, but not of all the IIIF Presentation 3.0 specification.
If you want to explore what support different viewers provide, the IIIF Cookbook provides a ‘Viewer Matrix’ where you can see what is available across 10 viewers listed. See https://iiif.io/api/cookbook/recipe/matrix/#viewer-matrix